


如何实现Twikoo自有服务器部署
说在前面
必须要说的小秘密
1.首先Twikoo如果部署到云开发CloudBase在腾讯云没改规定前,的的确确是一个非常好的方式,但是腾讯云变天了呀,所以费用的的确确是增加了,不太建议【壕忽略】 ;
2.在Vecel+ MongoDB部署,这个博主也是用过一段时间,不得不说一个评论提交能等的感人,再加上不是自己的终究不稳定,但是作为一个免费且暂时没有服务器的确实是一个解决方案;
3.在看到博客评论系统Twikoo本地化部署 | allbs的博客觉得超级nice,所以放到自己的服务器上就很nice,效果也很明显
| 部署方式 | 描述 |
|---|---|
| [一键部署] | [ 不建议 ] 虽然方便,但是仅支持按量计费环境——也就是说,一键部署的环境,当免费资源用尽后,将会产生费用。且按量计费环境无法切换为包年包月环境。免费额度数据库读操作数只有 500 次 / 天,无法支撑 Twikoo 的运行需求。 |
| [手动部署] | [ 建议 ] 手动部署到腾讯云云开发环境,在中国大陆访问速度较快。由于基础版 1 已从 0 元涨价至 6.9 元 / 月,需要付费购买环境才能部署。 |
| [命令行部署] | [ 不建议 ] 仅针对有 Node.js 经验的开发者。 |
| [Vercel 部署] | [ 建议 ] 适用于想要免费部署的用户,在中国大陆访问速度较慢。 |
| [私有部署] | [ 建议 ] 适用于有服务器的用户,需要自行申请 HTTPS 证书。 |
本地化部署【超详细】
1.安装tkserver
1 | npm i -g tkserver |
2.配置环境
这里需要说明的是其实这个可以通过echo写入,也可以直接打开/etc/profile文件写入,效果是一样的
| 名称 | 描述 | 默认值 |
|---|---|---|
TWIKOO_DATA |
数据库存储路径 | ./data |
TWIKOO_PORT |
端口号 | 8080 |
TWIKOO_THROTTLE |
IP 请求限流,当同一 IP 短时间内请求次数超过阈值将对该 IP 返回错误 | 250 |
通过echo写入
1 | echo " ">>/etc/profile |
通过直接写入
1 | vim /etc/profile |
需要写入的文件【可以直接复制修改即可】
1 | # Made for tikoo env by serious on 2022-09-07 |
3.启动服务
1 | nohup tkserver >> tkserver.log 2>&1 & |
4.现在就可以直接通过ip地址:端口号访问了
若显示以下信息说明已经Twikoo在后台运行ok了
1 | {"code":100,"message":"Twikoo 云函数运行正常,请参考 https://twikoo.js.org/quick-start.html#%E5%89%8D%E7%AB%AF%E9%83%A8%E7%BD%B2 完成前端的配置","version":"1.6.7"} |
5.在Butterfly中配置_butterflyconfig.yml
1 | comments: |
1 | # Twikoo |
关于域名解析如果是http的情况下,可以使用服务器IP地址:端口号,但是为了网络安全,现在已经逐步重视,所以Https已经成为主流,但是https是不允许嵌入http的,肯定会报错的,所以这个在nginx上可以按照这样的形式来代理
1 |
|
6.Twikoo环境配置
首次进入会需要设置密码,这里就省略咯
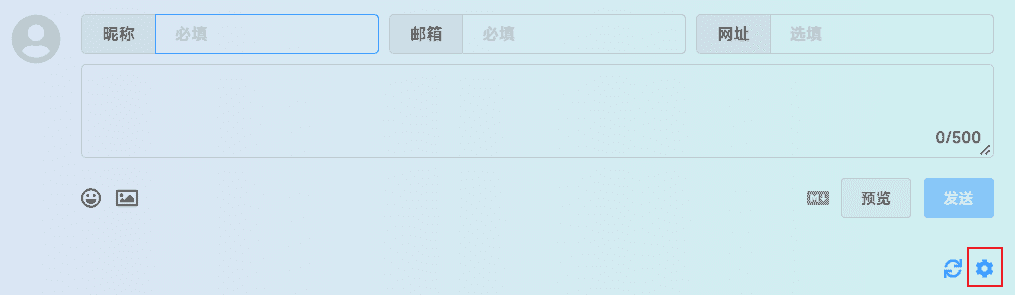
创建用于接收消息的通知【这里需要用企业微信,可以在手机上下载app】

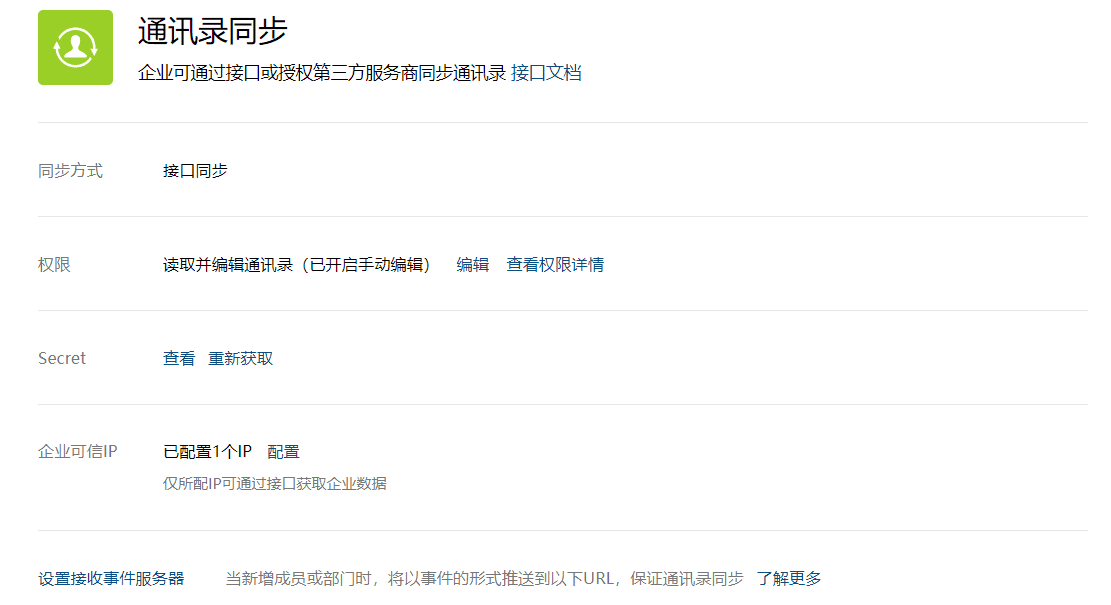
在创建的应用中找到如下的企业可信IP,将自己的服务器IP地址放到里面

配置管理工具->通讯录同步中的白名单ip
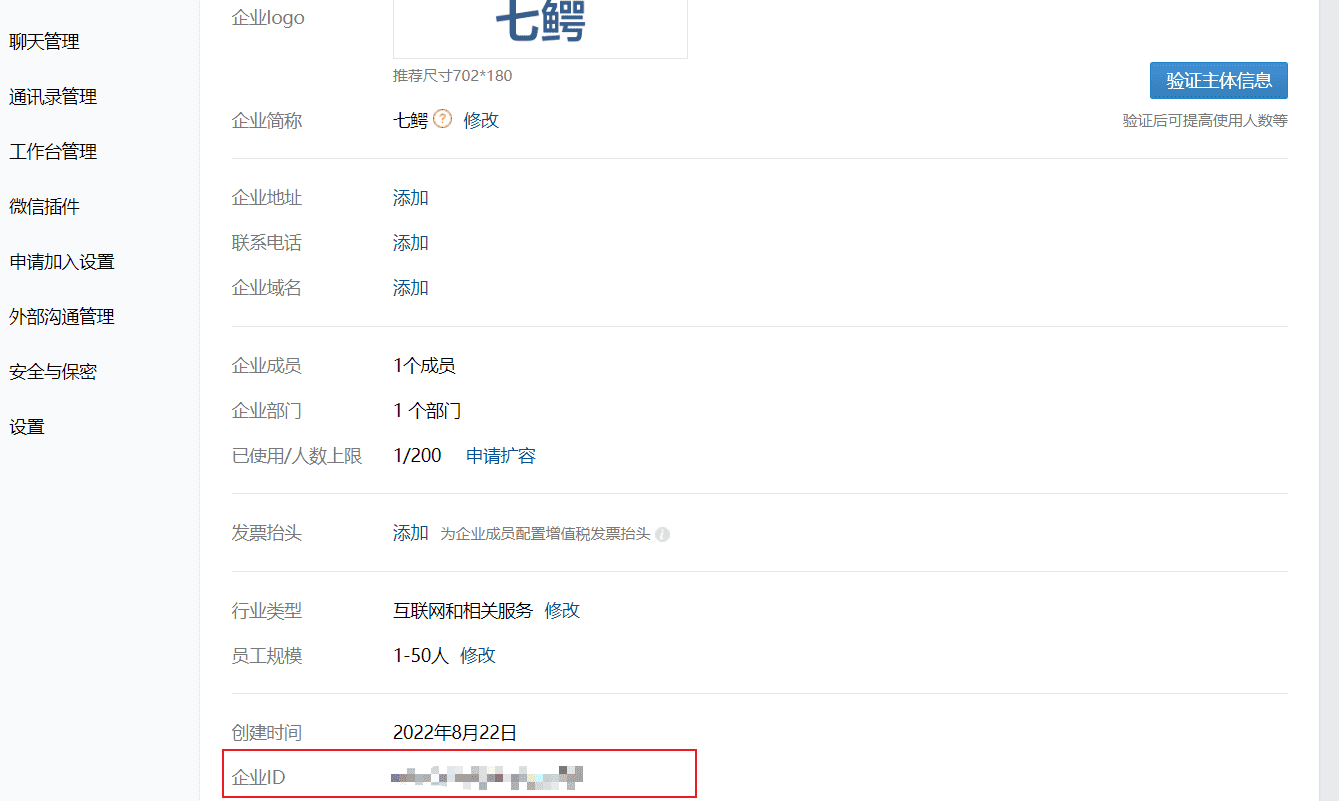
获取企业ID
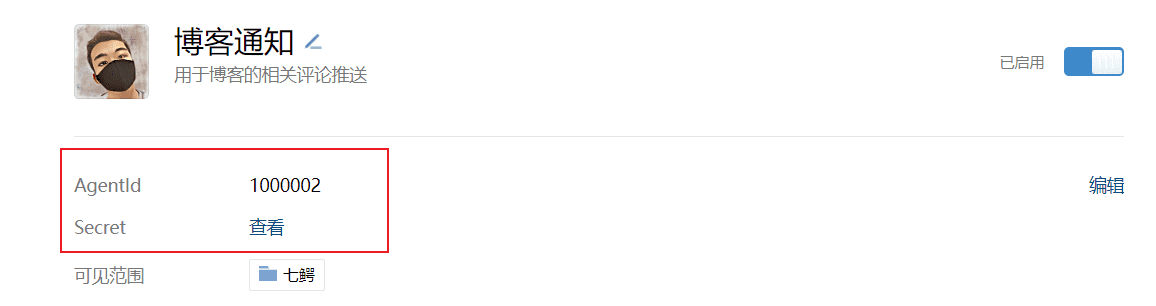
获取用于接收消息的应用的AgentId和Secret,Secert需要使用企业微信桌面版授权查看
配置信息
这里的PUSHOO_TOKEN是由以下三部分组成的: 企业ID # 上方创建的应用Secret # 上方创建应用的AgentId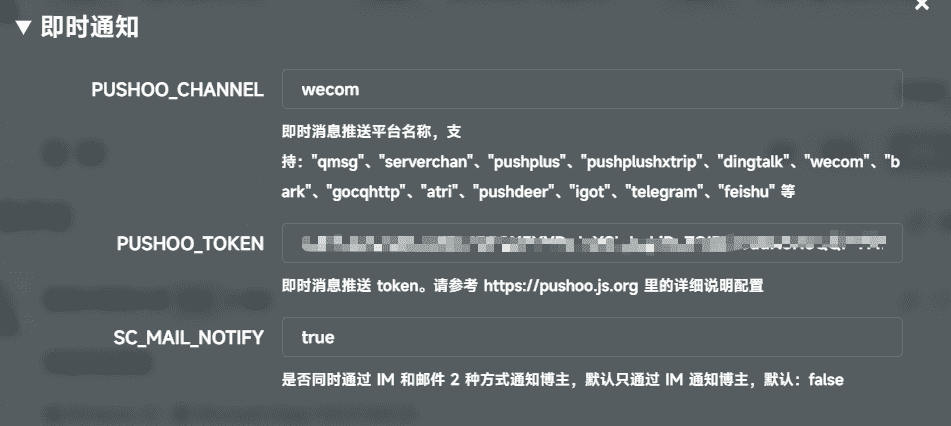
关于邮件的通知按照邮件通知中相应信息填写即可
基本上需要填写的是
SENDER_EMAIL:这个是自己的邮箱(这里本人用的是qq邮箱)
SENDER_NAME:邮件的通知标题
SMTP_SERVUCE:可以选择QQ或者其他
SMTP_USER:邮件通知邮箱用户名
SMTP_PASS:这里如果qq或者163需要填写授权码
MAIL_TEMPLATE:通知邮件模板【下面会给大家推荐我在用的】以下html复制直接用即可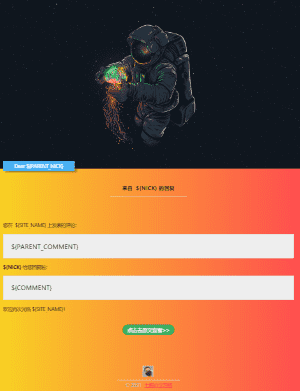
1
<div> <div id="isForwardContent"> <div> <div id="content"> <div style=" background: #FF4E50; /* fallback for old browsers */ background: -webkit-linear-gradient(to right, #F9D423, #FF4E50); /* Chrome 10-25, Safari 5.1-6 */ background: linear-gradient(to right, #F9D423, #FF4E50); /* W3C, IE 10+/ Edge, Firefox 16+, Chrome 26+, Opera 12+, Safari 7+ */ width: 95%; max-width: 800px; margin: auto auto; border-radius: 5px; border: #49b1f5 1px solid; overflow: hidden; -webkit-box-shadow: 0px 0px 20px 0px rgba(0, 0, 0, 0.12); box-shadow: 0px 0px 20px 0px rgba(0, 0, 0, 0.18); "> <header style="overflow: hidden"> <img src="https://blog.gmcj0816.top/img/tiankong.jpg" style="width: 100%; z-index: 666" /> </header> <div style="padding: 5px 20px"> <div class="dear" style=" position: relative; color: white; float: left; z-index: 999; background: #49b1f5; padding: 5px 30px; margin: -25px auto 0; box-shadow: 5px 5px 5px rgba(0, 0, 0, 0.3); ">Dear ${PARENT_NICK}</div> <br /> <center> <h3>来自 <strong>${NICK}</strong> 的回复</h3> </center> <hr style="width:200px;border:0;border-bottom:1px solid #e5e5e5;margin:12px auto;" /> <br /> <p>您在 <a href="${POST_URL}" style="text-decoration: none; color: #000000" target="_blank"> ${SITE_NAME} </a>上发表的评论:</p> <div class="tk-content" style=" border-bottom: #ddd 1px solid; border-left: #ddd 1px solid; padding-bottom: 20px; background-color: #eee; margin: 15px 0px; padding-left: 20px; padding-right: 20px; border-top: #ddd 1px solid; border-right: #ddd 1px solid; padding-top: 20px;">${PARENT_COMMENT}</div> <p> <strong>${NICK}</strong> 给您回复啦: </p> <div class="tk-content" style=" border-bottom: #ddd 1px solid; border-left: #ddd 1px solid; padding-bottom: 20px; background-color: #eee; margin: 15px 0px; padding-left: 20px; padding-right: 20px; border-top: #ddd 1px solid; border-right: #ddd 1px solid; padding-top: 20px; ">${COMMENT}</div> <p>欢迎再次光临 <a style="text-decoration:none; color:#000000" href="${SITE_URL}" target="_blank">${SITE_NAME}</a>!</p> <br /> <div class="chakan" style="text-align: center;"> <a href="${POST_URL}" style="color:#ffffff;text-decoration:none;display:inline-block;min-height:28px;line-height:28px;padding:0 13px;outline:0;background:#3eae5f;font-size:13px;text-align: center;font-weight:400;border:0;border-radius:999em" target="_blank">点击去原文查看>></a> <p> </p> </div> <div class="footer-p" style="text-align: center; margin-top: 5rem; display:block;color:#b3b3b1;text-decoration:none;"> <img src="https://blog.gmcj0816.top/img/SeriousWission_TouXiangPic.png" style="width:1.8rem; margin:0 auto" /> <hr style="width:165px;border:0;border-bottom:1px solid #e5e5e5;margin:5px auto;" />© 2021 <a href="https://blog.gmcj0816.top/" style="text-align:center; color: red" target="_blank">七鳄の学习格</a> <p> </p> </div> </div> </div> </div> </div> <br /> </div> <style type="text/css"> .qmbox ::-webkit-scrollbar { display: none; } </style> <style id="cloudAttachStyle" type="text/css"> .qmbox #divNeteaseBigAttach, .qmbox #divNeteaseBigAttach_bak { display: none; } </style> <style id="blockquoteStyle" type="text/css"> .qmbox blockquote { display: none; } </style> <style type="text/css"> .qmbox body { font-size: 14px; font-family: arial, verdana, sans-serif; line-height: 1.666; padding: 0; margin: 0; overflow: auto; white-space: normal; word-wrap: break-word; min-height: 100px; } .qmbox td, .qmbox input, .qmbox button, .qmbox select, .qmbox body { font-family: Helvetica, 'Microsoft Yahei', verdana; } .qmbox pre { white-space: pre-wrap; white-space: -moz-pre-wrap; white-space: -pre-wrap; white-space: -o-pre-wrap; word-wrap: break-word; width: 95%; } .qmbox th, .qmbox td { font-family: arial, verdana, sans-serif; line-height: 1.666; } .qmbox img { border: 0; } .qmbox header, .qmbox footer, .qmbox section, .qmbox aside, .qmbox article, .qmbox nav, .qmbox hgroup, .qmbox figure, .qmbox figcaption { display: block; } .qmbox blockquote { margin-right: 0px; } </style> <style type="text/css"> @media screen and (max-width: 1100px) {#content p {font-size: 10px;} #content h3 {font-size: 14px;} .footer-p {font-size: 9px;} .dear {font-size: 12px;}} </style> <style id="ntes_link_color" type="text/css"> .qmbox a, .qmbox td a { color: #236da1; } </style> </div>


![Unity3d热更新之xLua热更新[基础]](/img/cover/xlua_cover_one.jpg)
![Unity3d热更新之xLua热更新[C#调用Lua]](/img/cover/xlua_cover_two.jpg)

![Unity3d热更新之xLua热更新[Lua调用C#]](/img/cover/xlua_cover_three.jpg)